 .
.
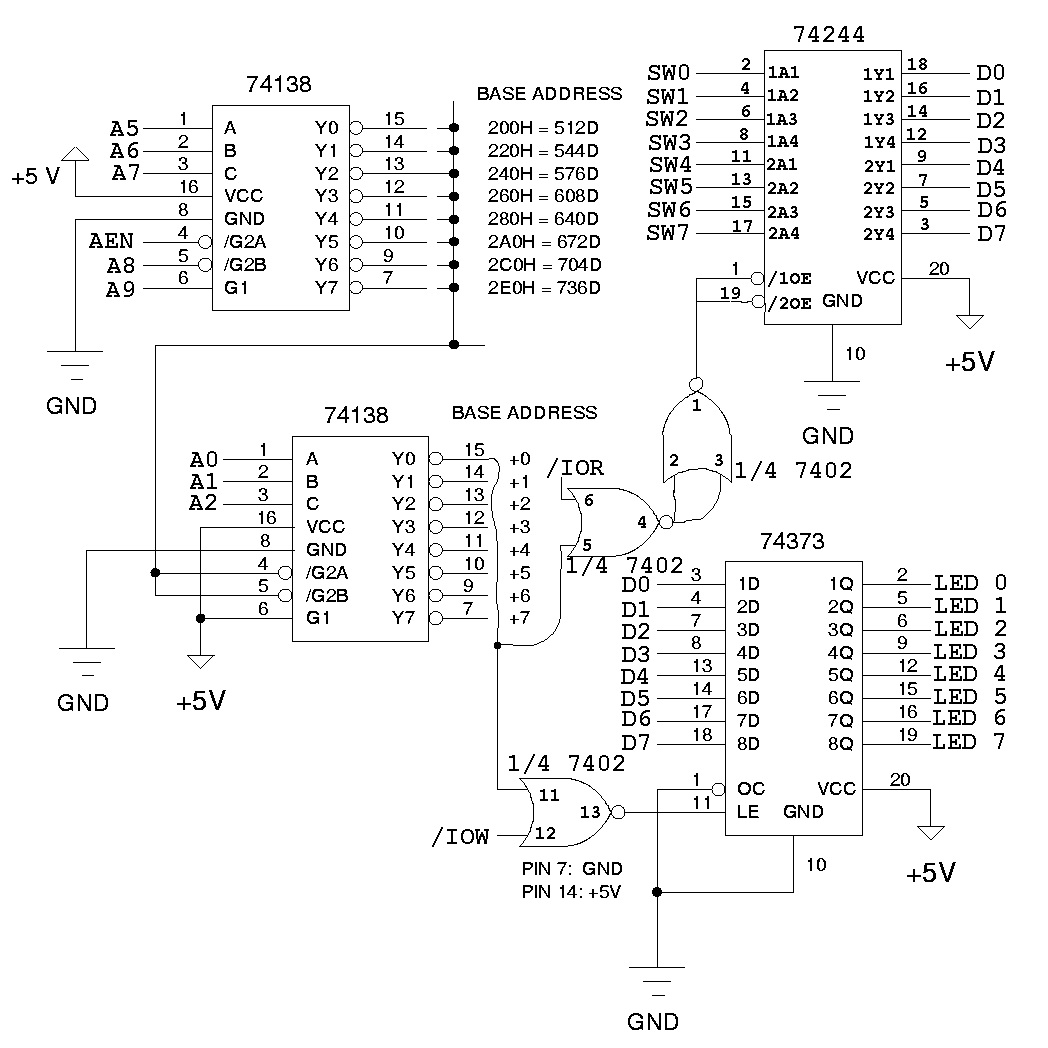
(click to enlarge) Note that the above diagram is simplified, e.g. other end of switches not indicated (usually use pullup resistors, e.g. 510ohm, and ground through switches).
We are using a solderless ISA prototyping card to interface to the microprocessor.
Each year we have
solderless breadboards
signed out to each 2 groups. (a group of groups).
Each group of groups should select the identity element of their group (e.g. an individual to be the group group leader).
here's
another diagram where it's more
intuitive how the address 240 comes about:
.
(click to enlarge)
Note that the above diagram is simplified, e.g.
other end of switches not indicated (usually use pullup resistors,
e.g. 510ohm, and ground
through switches).
If you like the idea of using your own breadboard, it will be easier to follow this wiring diagram which includes the ribbon cable, and a suggested convention for wiring the ribbon cable.
If this is still confusing, there are some pictures from last year's boards you can look at.
be patient and assemble the board carefully: