ECE385H1F WED 13 DEC PM 2-5 MP125
A previous year's final exam:
teaching schedule, http://wearcam.org/ece385/
ECE385H1 F Microprocessor Syst L0101 N WF3   BA 1180
                        P0101           T3-6
                        P5101           M6-9 monday evening labs cancelled
                        P5201           W6-9
first day of CS classes september 11th, so first ece385 lecture september 13th
Labs 65%
Final exam 35%
Prof. Steve Mann
2006 teaching assistants:
Ryan Janzen; and Ali Tizghadam.
Specifically, in x86 architecture computers, understand the workings of the parallel port architecture, electrical connections, and programming to affect and access the parallel port.
You should be able to make your own device, for example, something with 8 LEDs that receives a byte input from the parallel port and displays this information.
This kind of interface can be used to control various appliances by way of being connected to the parallel port, and operated from simple scripts.
As an example of a totally new appliance built to connect to the parallel port, see, for example, SeatSale (License to Sit).
See also, some pictures, etc., from labs of years gone by (this year we won't be doing the ISA bus).
Example of parallel port device driver, "ibus"
Revised parallel port device driver
Useful references for parallel ports and device drivers:
Excellent or best implementation(s) may be selected for the Hall of Fame, etc..
Grading: 2 marks each (out of 10 marks total), in each of the 5 tasks:
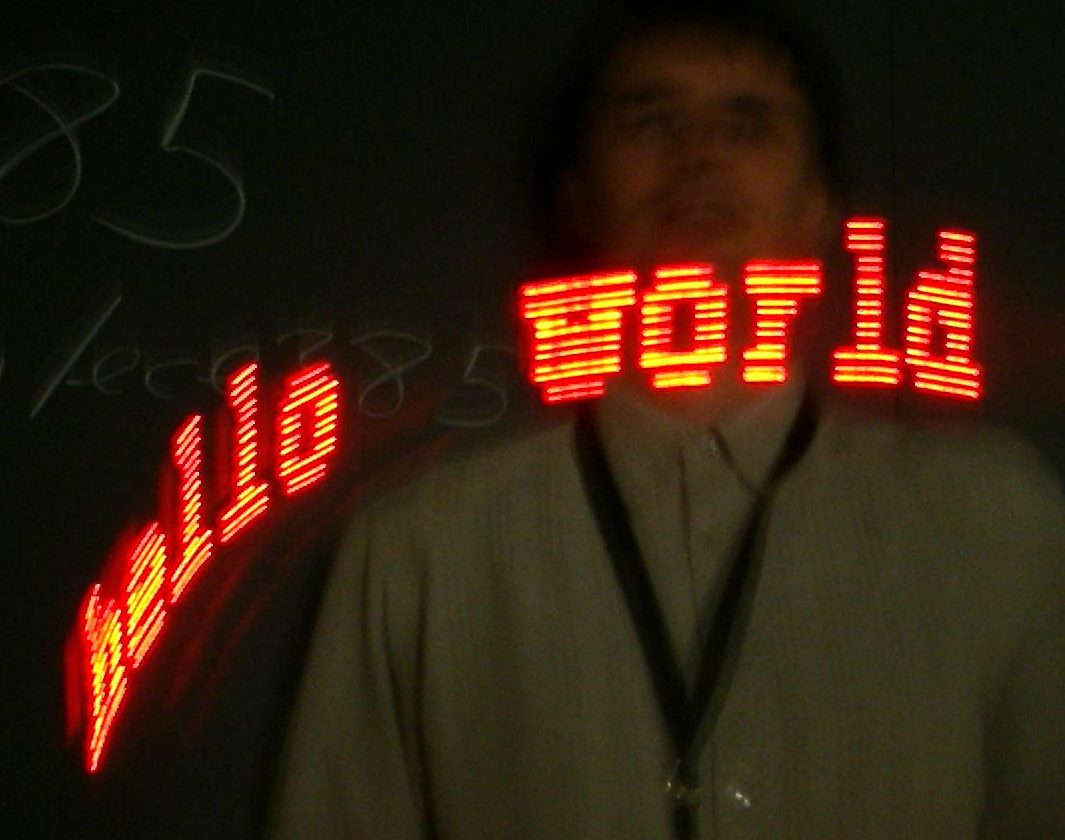
Pushbroom Display of "HELLO WORLD  " (infinite loop) to LEDs
HELLO<space>WORLD<space><space>

Keyer to AVR (reading data from a plurality of switches)

Arbitrary text pushbroom actuated by keyer

Design of program, cleverness, good program organization, etc..

Answer some random questions on your implementation, or on related material
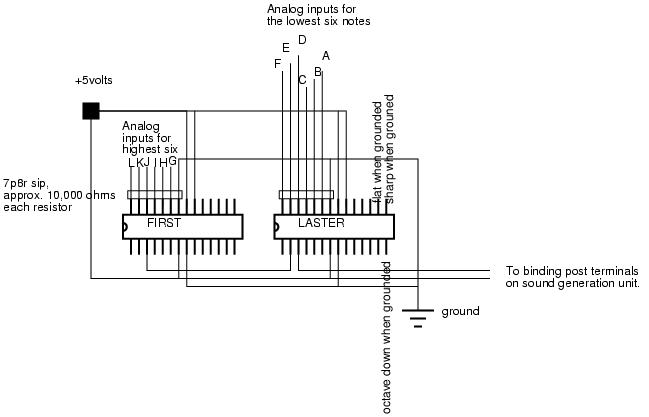
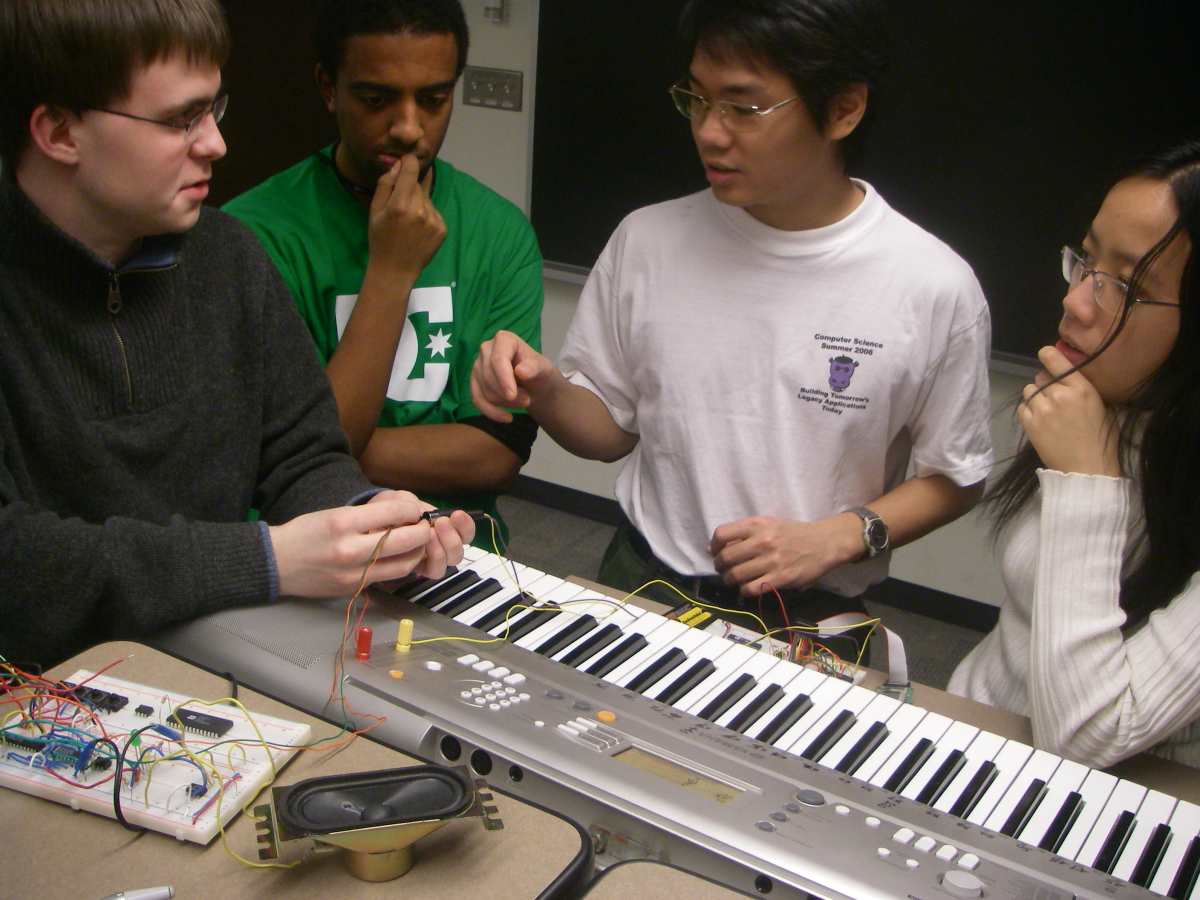
To achieve this, you will connect two AVRs together serially, sending data from one to the other, and connect one of these two AVRs to an external device, sending data to that external device.
The external device produces audible feedback.
The external device can be any MIDI device, such as the keyboard in the Bahen 3175/3185 Department of Computer Science student computer cluster, on the table next to the communal printer.
You can get the general idea of a musikeyer from reading previous years' versions of this lab, although this year, it is simplified to emphasize serial communication.
Grading scheme:
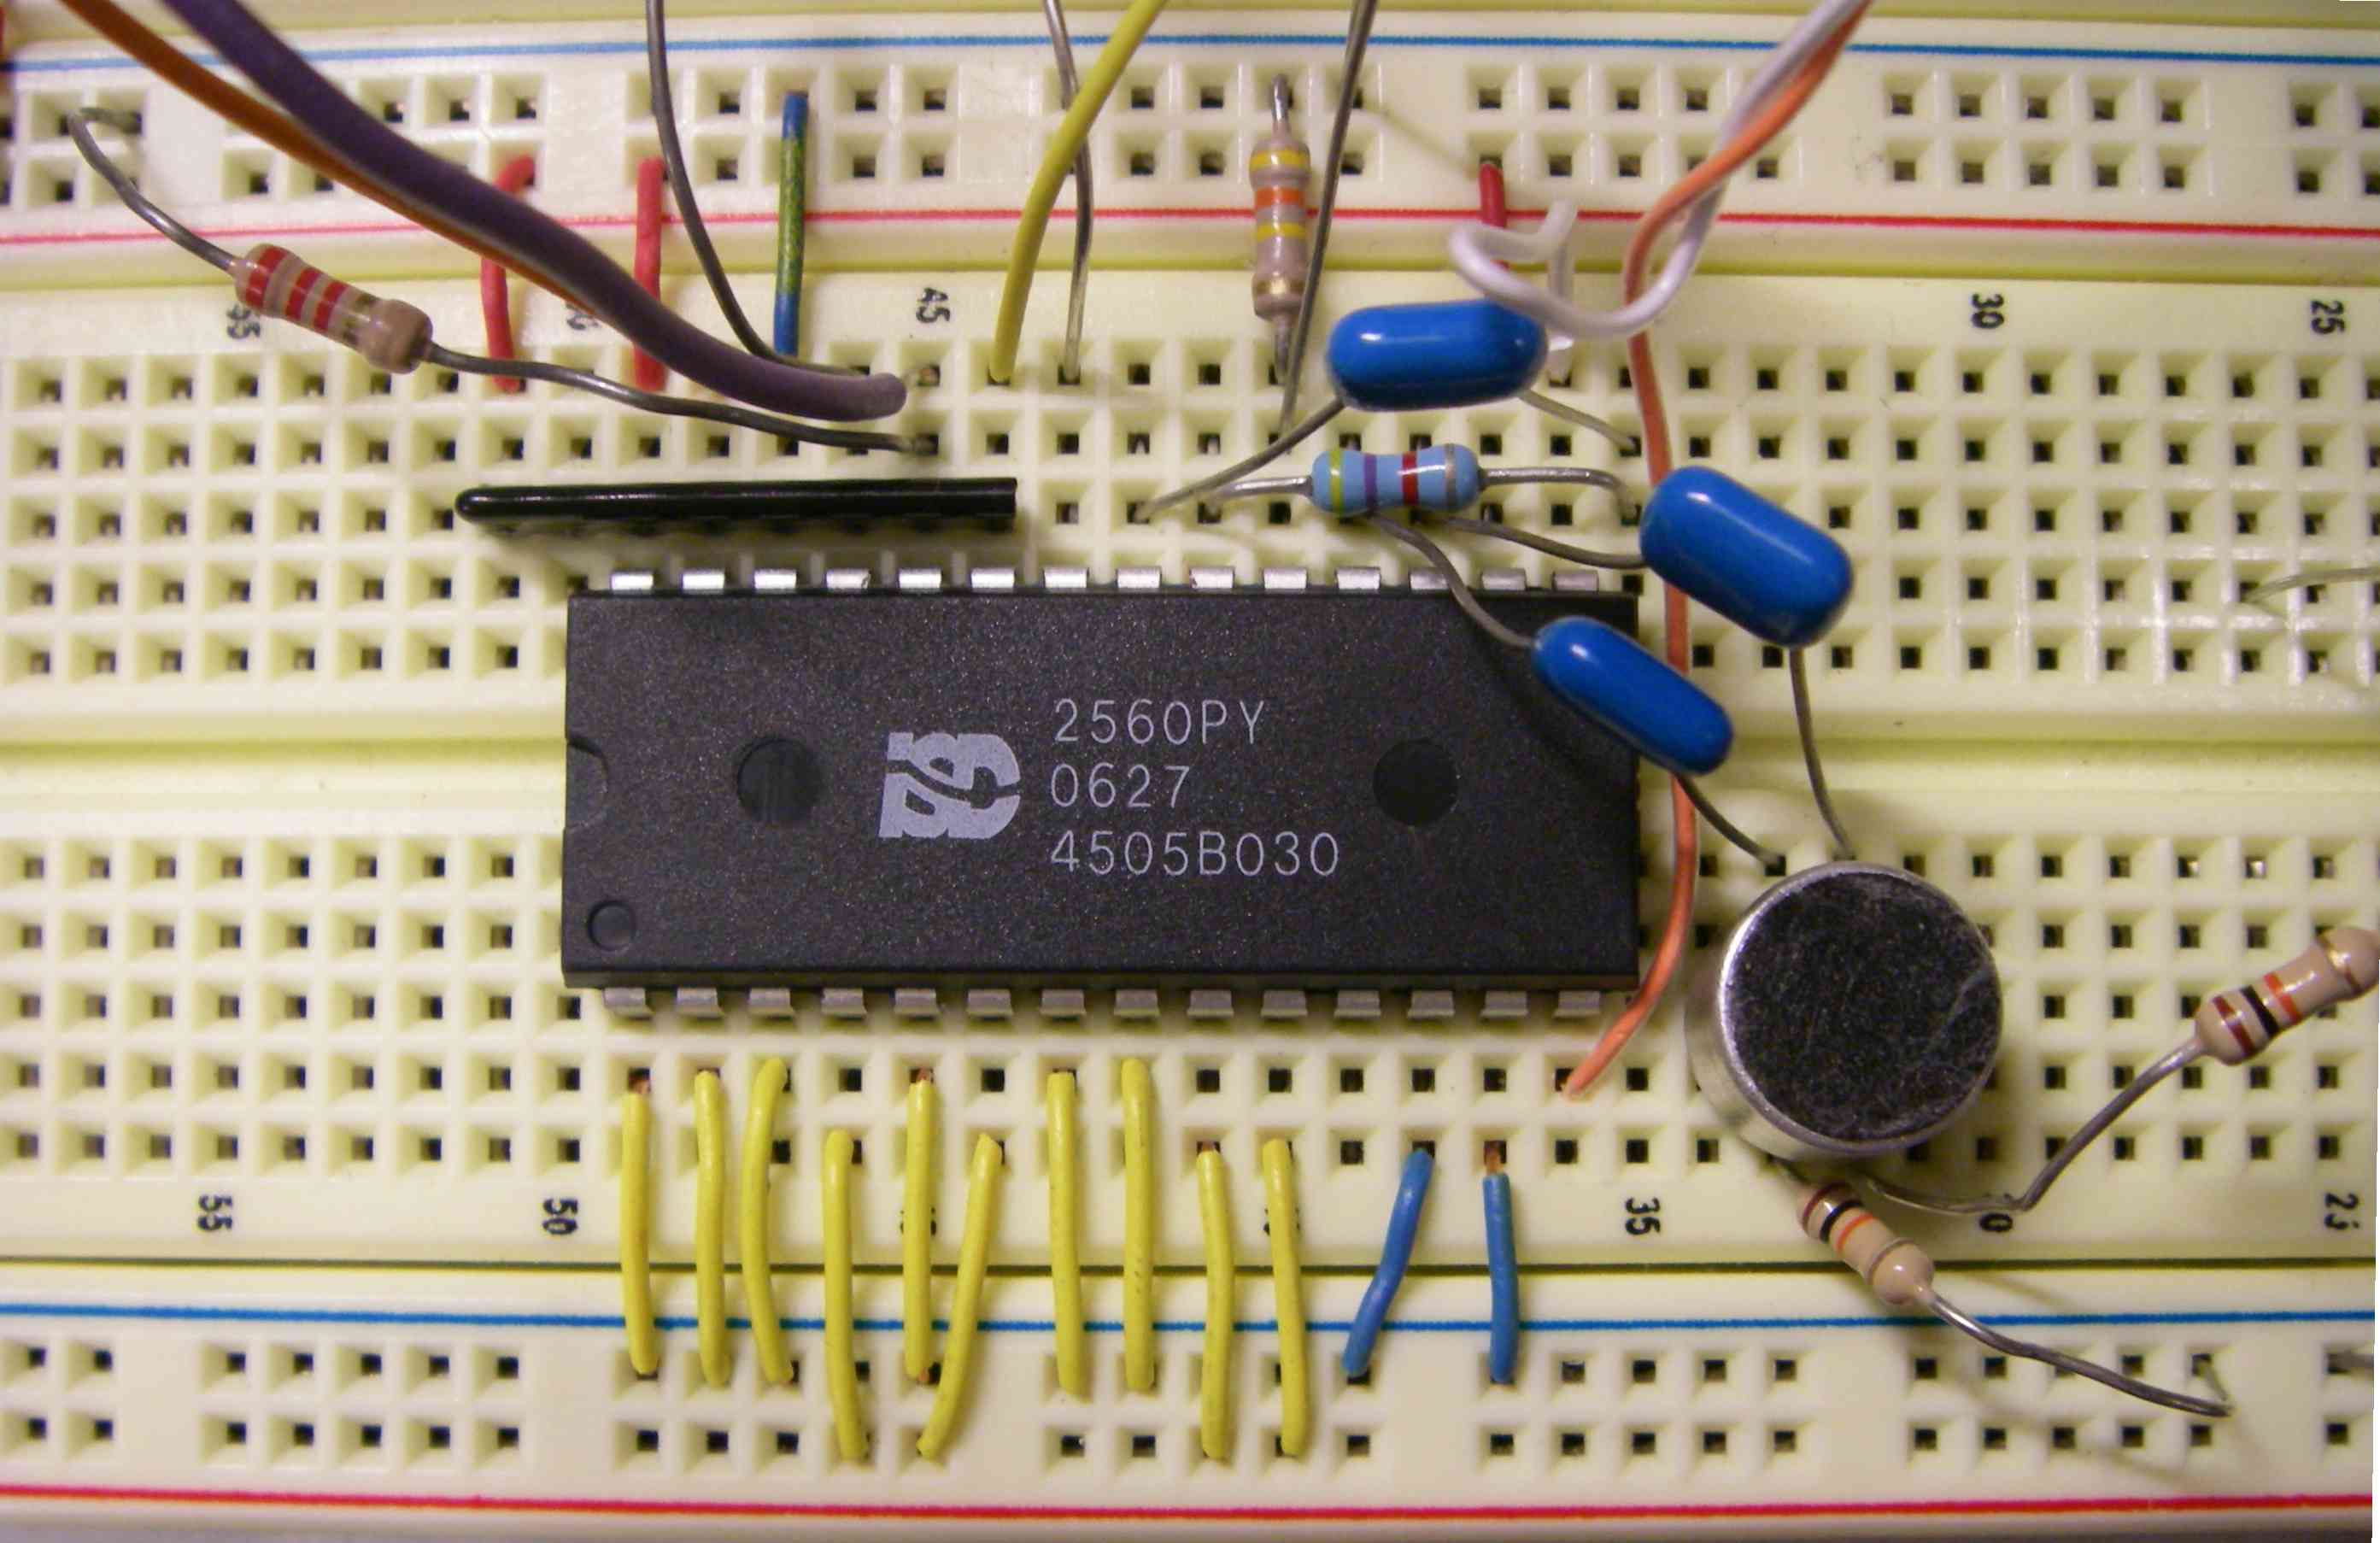
I usually use 22 microfarad tantalum capacitors, but if you don't have that exact value or type, try something similar, e.g. perhaps a 10 microfarad tantalum capacitor, or a 10 microfarad electrolytic in parallel with a 0.1 microfarad disk capacitor.
Grading:
Select a final project that demonstrates what you have learned so far.
For example, you can continue working on Lab 7 as an extension of Lab 5, adding to it, and taking it further, to combine Lab 5 and Lab 7 into an extension of this work, or to embody either Lab 5 or Lab 7 in further work, some blend thereof, or you can work on any one of the other labs and suggest how you would build upon it, or you can propose a project of your own.
Your final project should be agreed upon, to ensure that it is both sufficient, yet realistically attainable in the time remaining.
As mentioned in class last day, we will review what each lab group has proposed to work on, on Friday.
This final project will take up the remaining 3 lab periods, but you need to demonstrate and be graded on some portion of it each week during these 3 lab weeks.
Therefore, this upcoming lab, you will be graded on what you have done on the project thus far. Each of the three remaining grading sessions has equal weight, and each of these three remaining grading sessions has the same weight as any other lab. That means that the final project as a whole has three times the amount of weight, in total, as one of the other labs.
Other suggestions we've come to mutually understand: Simon implementation that uses 12 LEDs and a MIDI keyboard (input and output). This requires programming an AVR to "listen" to MIDI.
Resources for final projects: There are many resources you can fine. For example, look at some websites of other 3rd year CS courses, such as this one which is a lab in a third year CS course on creating a MIDI data receiving system on AVR.
See also, MIDI Communication and Geek Page Rolling Your Own MIDI Sensors, as well as Ryan's opto coupler MIDI interface.
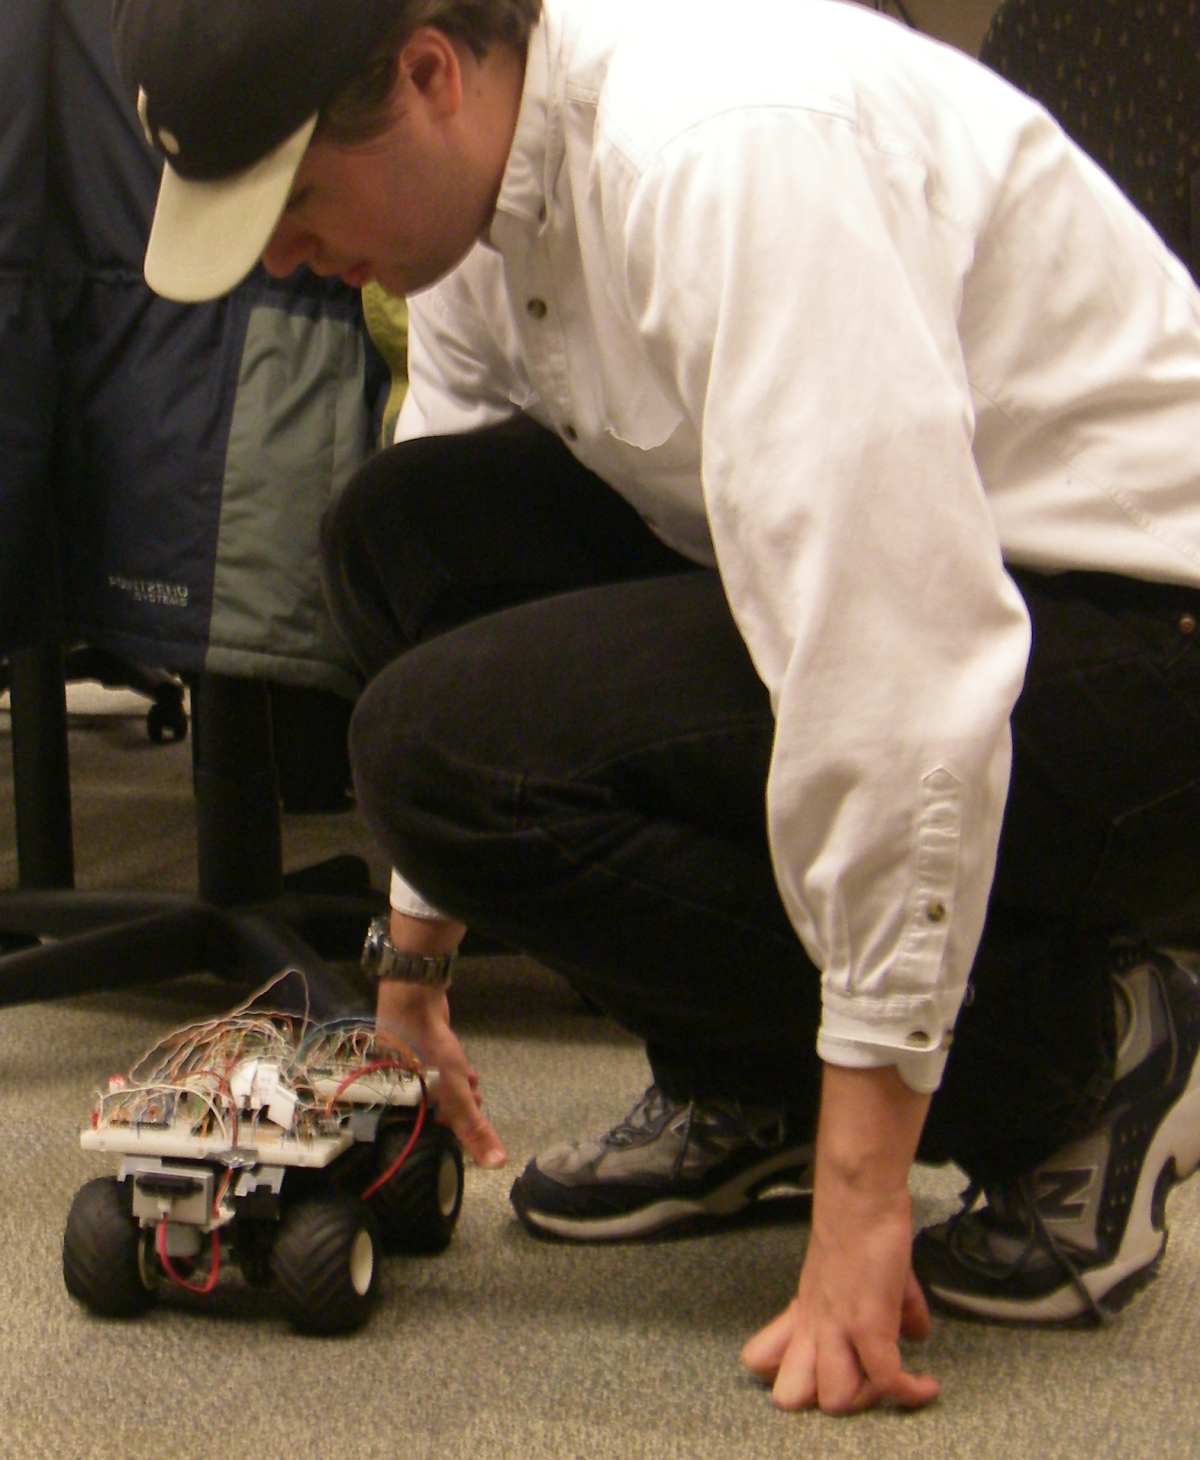
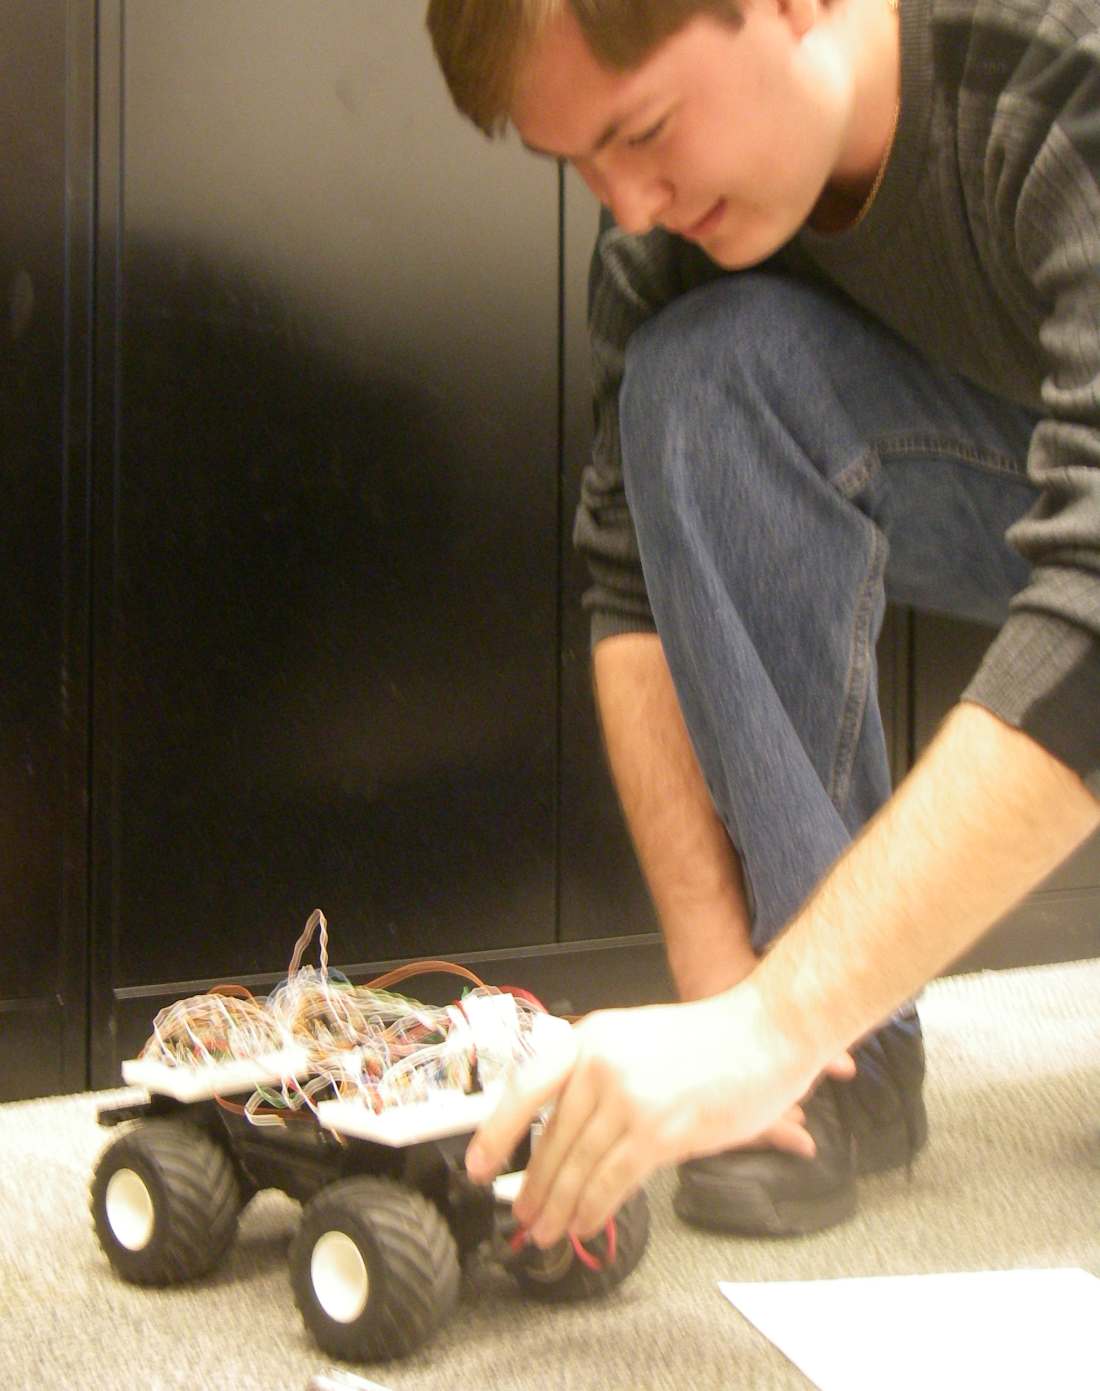
Martin and Roman's autonomous land vehicle:
Two other groups who decided to work on the Simon project:
For other ideas, see also last year's labs www site, http://eyetap.org/ece385.
labs form groups of 2 people per group.
various editions of such a textbook are available at low cost since a fast textbook is not required (e.g. 100mhz 486 or 200mhz pentium, or so will suffice, as long as it has the right architecture, i/o ports, etc., e.g. it must have a parallel port), unless you want to be really creative with USB.
any recent edition of the text will be fine, e.g. the 4th edition (486) or fifth edition (pentium), a computer that is cheap enough that students won't be afraid to hack around with it and learn a lot about microprocessors.
each student lab group of two persons will purchase their own computer as the course textbook.
prices tend to range from about $50 to $150 for a good computer in good working condition. although a computer in poor condition can be purchased in the $0 to $10 price range, it is suggested that a computer in good working order be purchased.
the computer must have a parallel port.
note that some small laptop computers lack a true parallel port, and also note that a usb parallel port is often not a true parallel port and will often lead to problems later on.
you can get a computer that has a parallel port at above all surplus or at active surplus (addresses and phone numbers are on last year's lab website in http://eyetap.org/ece385).
we have negotiated a special deal with active surplus, for "professor steve mann's ece385 class". part of the learning experience is buying a cheap surplus used computer, and getting it to do things far faster and more efficiently than new computers costing ten times as much but crippled with poorly designed operating systems.
students will bring the computers to labs, so we are recommending a sleek and slender very small size computer. although storage space may be provided in the lab for these computers, in the past, most students take their textbooks home with them regularly, to work on the labs.
students will be expected to install an operating system (gnu linux debian distribution) on the microprocessor based computers. the first lab exercise will be the installation of a real operating system (gnu linux, not virus95, virus98, or virusNT), and demonstration of the ability to connect a device to the computer and operate the device.
the reason for a freesource operating system like debian gnu linux is that the course is built on the principles and philosophy of openscience.
material will be taught with an emphasis on contemporary theory and practice of microprocessors, and the "stuff that matters" (e.g. the "stuff that matters" to students, in the sense of getting a great job upon graduation or for getting into a great research position, grad school, or the like).
in particular, students will learn not just how microprocesors work, but also how to use them, and how to connect things to microprocessors in both hard and soft aspects (e.g. both how to connect up things and how to get the operating system to see these things by way of writing some simple device drivers).
by the end of the course students will not be afraid to open up a computer, build something, and connect the something to the computer, and then extend the operating system to make sense of that something, at both the device driver, as well as at the userspace levels.
You can also look at the following text document kernel-docs.txt which I copied form the Debian 2.1 Linux source tree (in the directory /usr/src/linux/Documentation). It lists a series of references related to kernel hacking, which you may find useful. However, you may also want to look at more recent kernel documentation, as the kernel is contstantly changing.
Additionally,
there is a FREE textbook, (free as in free speech AND free beer):
http://www.xml.com/ldd/chapter/book/index.html
Download this book for free, and feel free to read it, print it,
modify it, and enjoy it.
See also, Linux Kernel Module Programming Guide Ori Pomerantz.
To see your grades you will need to install and learn how to use gnumeric (the gnumeric spreadsheet program) which you can use after installing gnumeric (e.g. "apt-get install gnumeric").
Survivability grade: this is out of 1. There is 1 mark in each lab which is assigned for keeping the lab neat and tidy, and returning it to its original state, without loss or damage to any elements of the lab space.
lecture3: machine instructions
lecture4 pushbroom, lab info for next lab
a good example of lab1, from Mansoor Riaz and group, following well the recommendations from class, for font layout, etc.
from the hackers mailing list: building games: computer control of the lights in a building; Chaos Computer Club (CCC) event
lecture5 math c examples, differences in architecture, etc
ECE385 Lab1, 2003
lecture6 (getting ready for lab2)
ECE385 Lab2, 2003
lab2 (see also http://eyetap.org/ece385/)
lecture7: device drivers, virtual addr., paged memory
lecturedram: memory systems for microprocessors
lecturetiming: the sands of time, used in lab3
fonts: bdf (bitmap distribution format) and btf (bitmap teaching format), etc..
lecturesram: SRAM = static memory for microprocessors
lab6 new 82c54 pwm code for series 2.4 kernels
Pictures from of lab 5 (actually taken during lab6) last year: http://wearcam.org/ece385/pictures_lab5.
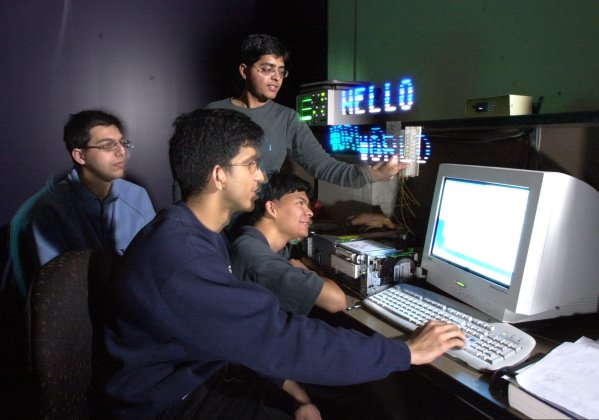
You can also connect LEDs to your serial port; if you want to try this, let me know and I'll bring in my Pro-Lite PL-M2014R LED sign for you to experiment with (see also some script files for the sign, including the first quiz).
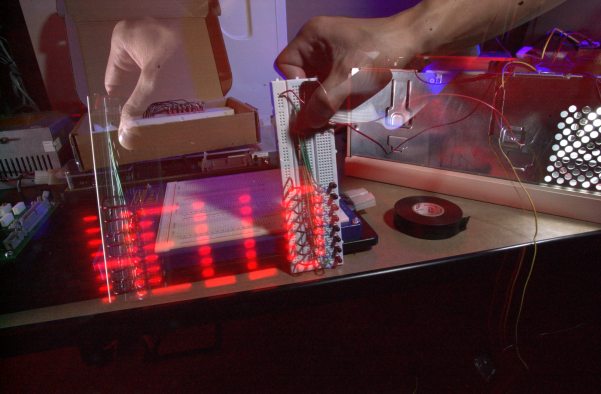
Hall of fame; Something cool from this year: lab 5 keyers
also, i also have a number of 4th year computer science thesis (cs495, cs494) projects available that could serve as a continuation of the "stuff that matters" learned in the course.
other notes, and matters of interest...
gnux process scheduling
other notes, and matters of interest...
If science is the art of reverse engineering nature,
e.g. unlocking the secrets of nature, or God,
then perhaps computer science is the art of reverse engineering
computers, e.g. unlocking the secrets of manufactuers.
See for example
freedom-t-tinker.com
ece385 lab9 hall of fame (cool lab9 projects)
summer projects: if interested in working on last year's "altera internet device" (with funding from xylinx it will be the "anything internet device"), please let us know. this is a device currently being used to connect anything from your wristwatch to your eyeglasses to your building (faucets, lightswitches, etc.) to the internet. for more information, see http://wearcam.org/books.htm
