


Assigned: 1998 Nov18
Due: 1998 December 2
This is a fun way to learn more about PhotoRendering (Photoquantigraphic Rendering).
Reminder: class project data acquisition day is Thurs. Nov. 19th; rain date = Monday Nov. 23.
Question 1: Using the images you obtained on that dusting day (which may be found in http://www.wearcam.org/ece1766/lightspace/dusting/) add various combinations of the images and describe the result for cases where the light sources do not overlap, and for cases where the light sources do overlap (e.g. same pixel coordinates in more than one image are illuminated by the light sources associated with each of these images).
Question 2: Combine the same images photoquantigraphically (e.g. in lightspace instead of imagespace), just as you did in the day+night picture of last assignment.
Question 3: Experiment with different weightings for rendering different light sources with different intensity. Arrive at a selected set of weights that provides what you feel is the most expressive image. This will be an artistic choice, that will hopefully be exhibited as a class project (e.g. image or images from each participant in the class). Your image should be 2048 pixels down by 3072 pixels across, and ppm or jpeg compressed with at least jpeg quality 90.
A convenient way of experimenting with the lightvectors in this directory is to use the "pnmcement" program.
This program takes one double (type P8) image and cements in one uchar (P6) image. First you need to decide what lightvector will be the starting image into which others will be cemented. Suppose we select "day.jpg" as the basis.
First convert "day.jpg" to ppm, as follows:
djpeg day.jpg > day.ppm

Verify this is a valid ppm file by looking at the beginning:
head day.ppm | less
you should see
P6
3072 2048
255
...

Then convert it to pdm (portable doubleprecision map), as follows:
pnmuchar2double day.ppm -o day.pdm

Verify that this is a valid pdm file by looking at the beginning:
head day.pdm | less
you should see
P8
3072 2048
255
...

You may want to work with smaller images, for example, using
pnmscale -xsize 640 -ysize 480 ...

Now try
gcc pnmcement_nocolour.c -lm -o pnmcement_nocolour
pnmcement_nocolour day.pdm v035.pdm > total35.pdm

Observe and describe the result.
To view the image you may wish to convert it back to uchar:
pnmdouble2uchar total35.pdm -o total35.ppm
and then use a program like gimp or xv to view it.

pnmcement_nocolour is missing the colour weightings.

Another program called pnmcement.c has the colour weightings but unfortunately
a small bug has crawled into the code and nested there.

Remove the bug in the program, and then try
pnmcement day.pdm v035.pdm .9 .7 .1 > total35.pdm
and observe and describe the resulting image.

Try several different weightings and lightvectors, e.g. once you have the
total35.pdm file, cement other lightvectors into that file:
pnmcement total35.pdm v030.ppm > total.pdm

Try cementing in several lightvectors with different weights and describe
the result.

If you like, you may wish to write a perl script that reads an ascii text file
called "cement.txt" and does this automatically.  An example ascii text file
follows ("#" denotes comments):

v035 .9 .8 .1   # that gives a very nice yellow glow from within lower window
v030 .9 .5 0    # that brings out nice appearance at top of window
# the above two give a good sense of the window
v025 0 0 .9     # ***great*** for top part of the second column
v029 .7 0 .8    # ***great*** for mid part of second column; really cool shadow
# the magenta backlight above is unnatural but looks really hyperreal
# i'll also try experimenting with blue front light and yellow backlight
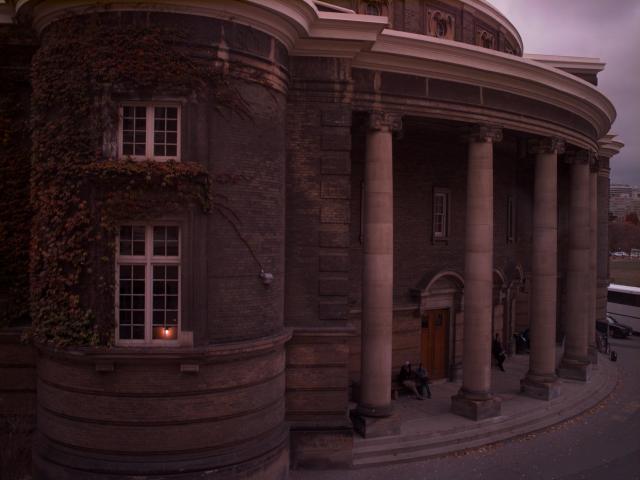
Three lightvectors are cemented into the basis image. These three
lightvectors appear below:
The cemented result appears below:
